There can be many causes when you have hot water heater problems. If you’re dealing with no hot water in your home, a bad thermocouple may be the reason, especially if your pilot light won’t stay lit. The thermocouple is critical in natural gas water heaters, as it shuts off the gas supply if the pilot flame goes out. Fortunately, thermocouple replacement is a relatively simple DIY project that doesn’t require specialized plumbing knowledge.
The good news? A replacement part typically costs less than $15, and with the right tools and a little know-how, homeowners can take care of this task in under an hour. This guide will walk you through the step-by-step process of how to replace a thermocouple on a water heater, along with tips for diagnosis, cleaning, and knowing when it’s time to call a professional.
Before starting, please note: If you smell gas or hear a hissing sound, do not attempt to relight the water heater pilot. Exit the home immediately and contact your gas utility provider.
What Is a Thermocouple?
A thermocouple is a small thermoelectric sensor that controls gas flow to your water heater’s gas burner. It’s a safety device: when the pilot flame is burning, the thermocouple senses the heat and allows gas to flow. If the flame goes out, it stops the gas to prevent leaks.
Thermocouples are found in standard and tankless gas water heaters, though some newer models may use a thermopile instead.
The thermocouple is mounted in the combustion chamber, attached to a bracket alongside the pilot tube. It connects to the gas control valve, and its job is simple but crucial: ensuring gas only flows when a flame is present. If it’s dirty, corroded, or damaged, your pilot won’t stay lit, meaning your water heater won’t work.
In most residential units, this component quietly protects your home daily, and it’s easy to overlook—until the water turns cold.
One quick note before you go out and buy a thermocouple: first, see if the tube that feeds gas to the pilot light is clogged up or not. If the tube has an obstruction, then you might be able to simply blow it out or use a thin wire to get it out of the way.
How to Tell If You Need a New Thermocouple
Here are common signs that suggest your thermocouple needs replacement:
- The water heater pilot light won’t stay lit after you release the control
- Despite repeated attempts to light the pilot, you’re getting no hot
- There’s visible buildup, rust, or corrosion on the
- Your water heater is nearing the end of its lifespan (typically 8–12 years), and components like the thermocouple may start to fail.
- Testing with a multimeter shows an output below 20
A consistent failure to maintain the pilot flame often points to a thermocouple that’s either too dirty to function or has simply worn out.
Sometimes, a dirty thermocouple can be cleaned. Remove it and gently scrub the tip with steel wool or fine sandpaper to remove buildup. If cleaning doesn’t restore functionality, it’s time to replace it.
Tools and Materials You’ll Need
Before starting your DIY replacement, gather the following items:
- Replacement thermocouple (match the old one in length and thread size)
- Adjustable wrench or open-end wrench
- Screwdriver (Phillips or flathead, depending on your model)
- Multimeter (optional, for testing output voltage)
- Steel wool or emery cloth (for cleaning)
- Soapy water (for leak detection)
Pro Tip: Thermocouples are easy to find at major retailers like Home Depot, and many include instructions on proper installation.
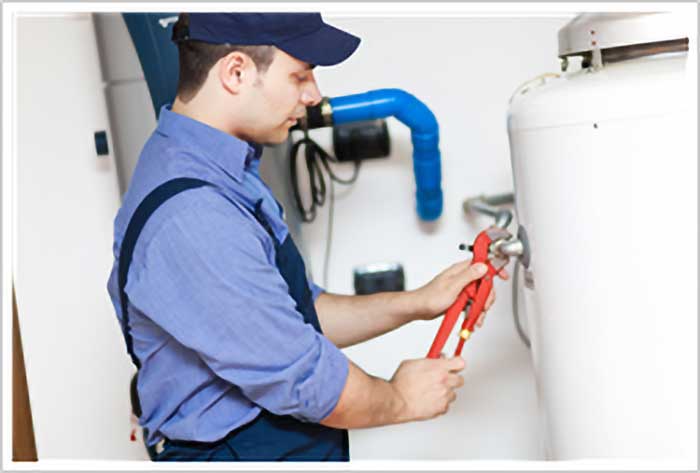
Six Simple Steps to Remove and Install a Water Heater Thermocouple
Once you know that you need a new thermocouple, here is what to do:
- Turn off the Switch the gas control valve to the “OFF” position. Wait several minutes to ensure the gas has cleared before proceeding. This step is essential for safety.
- Disconnect the thermocouple and two gas tubes from the The burner should come out easily enough as it is usually not attached tightly, or is under clips, inside the burning chamber. To disconnect the thermocouple and gas tubes, you will have to remove the three nuts that attach them to the valve. Keep all parts organized and clean as you work.
- Remove the The thermocouple is typically held in place by clips. Remove it from the bracket and pilot tube connection point. Note how the parts are oriented for reassembly. If you’re unsure, take a photo before removing the old parts.
- Buy a new thermocouple. Once your old thermocouple is out, you can take it to a hardware store or home improvement center to find the right replacement. Standard lengths range from 24 to 36 Some water heaters use universal thermocouples; others require a specific brand or model.
- Repeat steps 2-3 in reverse to install the new Reverse the removal steps. Slip the thermocouple back into the pilot assembly so the end of the thermocouple is in the correct position, reconnecting it to the pilot gas supply with the clips. Tighten the fittings and reassemble the burner. Ensure a snug but not overly tight fit—over-tightening can strip threads or damage parts. You will also have to use an open-end or adjustable wrench to reinstall the thermocouple connector lead and the gas tube to the burner and to reconnect the pilot gas tube with the valve.
- Turn the gas on and relight the pilot. Turn the gas control valve back to “ON.” Follow your water heater’s label instructions for relighting the pilot light, including what setting to put the thermostat on for relighting. Watch for any gas leaks: put soapy water onto the joints. If you see any bubbles when the main burner is on, then this could signal a serious problem. If leaks appear, turn off the gas and retighten fittings before testing again. Do not attempt to relight the pilot if you smell gas or hear a hissing sound.
Maintenance Tips for Extending Thermocouple Life
To keep your water heater operating efficiently and safely, it’s important to maintain the thermocouple regularly. These simple habits can help prevent unexpected failures and extend the lifespan of your equipment.
- Inspect the thermocouple annually during routine
- Clean any buildup or discoloration on the tip using fine
- Make sure the pilot flame is strong and blue—yellow flames may suggest an issue with gas flow or combustion.
- Keep the burner chamber free of dust, spider webs, and debris that can interfere with
- If relighting the pilot requires frequent attempts, test the thermocouple with a
Regular maintenance can extend the life of your thermocouple and prevent unnecessary shutdowns of your water heater.
When to Call in a Team of Plumbing Experts
If you’ve followed the instructions and your water heater still isn’t functioning, the issue may extend beyond a bad thermocouple. The gas valve, thermopile, or other components could be the real cause. You may need a plumbing technician’s assistance to assess what is wrong with the heater and to provide the solution.
If you’re unsure about any step or concerned about working with natural gas, don’t take the risk. The pros at A-1 Sewer & Septic Service are here to help. We specialize in plumbing services and water heater repair in Kansas City, including tankless units.
Whether it’s a faulty gasket, an outdated water heater, or a more serious leak, you can find the quality service you need at A-1 Sewer & Septic Service, Inc. No problem is too small or too great for our experienced team to handle. Even if you need help with your plumbing after business hours or on the weekend, we’ll diagnose the problem and restore your hot water quickly and safely.
Get your water heater repair or water heater replacement quote from a skilled Kansas City plumber when you call our office today!